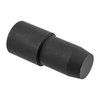
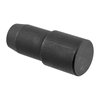
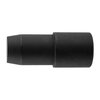
In the past, installing a magazine tube extension on one of the 870/1100/11-87 series of shotguns was as simple as removing the mag cap, prying up the magazine spring retainer and swapping out springs before screwing on the extension. With the advent of the detent style magazine spring & mag cap retention system this is no longer possible. Now one has to find a way to remove those detents so the follower can slide past them. The most common solution is to grind them away from the inside; while effective, this looks terrible and creates two ready access holes in the mag tube for dirt & other debris. XS® Sight Systems Magazine Tube Swage will allow you to easily remove these detents without creating these holes.
Más...
En el pasado, instalar una extensión del tubo del cargador en una de las escopetas de la serie 870/1100/11-87 era tan simple como retirar la tapa del cargador, levantar el retenedor del resorte del cargador y cambiar los resortes antes de enroscar la extensión. Con la llegada del sistema de retención del resorte del cargador y la tapa del cargador con detentes, esto ya no es posible. Ahora se debe encontrar una manera de eliminar esos detentes para que el seguidor pueda deslizarse más allá de ellos. La solución más común es desgastarlos desde el interior; aunque efectivo, esto se ve terrible y crea dos agujeros de fácil acceso en el tubo del cargador para la suciedad y otros desechos. El Swage para Tubo de Cargador de XS® Sight Systems te permitirá eliminar fácilmente estos detentes sin crear estos agujeros.
Más...
Evaluaciones de clientes para XS SIGHT SYSTEMS MAGAZINE TUBE DETENT SWAGE-REMINGTON 12 GAUGE
Número de evaluaciones: 11
De brownells.com: 11
Evaluación media: 4,2
Disappointed(22/03/2015)
I had high hopes for this. Being a machinist, I thought the concept was great as apposed to drilling the magazine tube. I tried several times and the detents only partially pushed out. What really made me give this one star is that it damaged the magazine tube. While it partially pushed out the detents it also pushed out the area of the mag tube where the detents are. This made it difficult to put the barrel back on. Now taking the gun apart and putting it back together are extremely difficult.
Great tool(22/05/2015)
This is a great tool, you will need a flat punch set and a hammer to use this though. No more need to drill holes in the tube to add an extension. Follow directions exactly and it works great. Very good value for the professional or hobby smith.
Does what is advertised(29/02/2016)
Simple , easy to use ( follow the instructions) I was able to almost get the detents out without "peening" as suggested in directions. Minor use of punch was required to "clean up" job. Added a 2 shot Scatter gun tech extension to a Remington 870 express magnum. Adds to versatility to my utility shotgun.
Right tool for the job!(07/04/2016)
This tool is definitely worth the money. I previously tried a "do it yourself" method of dimple removal and ended up ruining my old 870.
I bought this tool and tried it on a brand new 870 and within minutes I had the dimples removed and everything functioning perfectly!
Oil the tool, tap it in till the shoulder contacts the tube, you should notice the dimples have raised at this point, take a small punch and gently flatten the remainder of the creases where the dimples were while the tool is still in place. If everything is done correctly the tool will slide out without any effort.
I wouldn't hesitate to buy this tool even if you only use it one time, it's definitely cheaper than the cost of a replacement magazine tube!
XS SIGHT SYSTEMS MAGAZINE SWAGE(30/10/2016)
A great tool, read the instructions carefully before you proceed. I set up my Remington 870 action/mag tube in a gun vice in the vertical position, clamping on the action flats. As per instructions I gave the swage and the inside of the mag tube a light coat of firearms grease. Using my Brownell's gunsmith hammer, it took me four hits to bring the shoulder on the swage to the edge of the mag tube. Keep an eye on the progress of the swage and as soon as the swage shoulder touches the edge of the mag tube, stop hitting it. Then using a 1/4" diameter flat punch I peened the dimples carefully. I knew the job was done when the swage slipped easily out of the mag tube. I then used a rotary tool with a light sanding spool to polish the inside of the tube where the dimples had been. Reassembly of the mag tube was without problems and the shell follower and mag tube spring operate smoothly. This is a simple and valuable tool if you are building a tactical type Remington 870. I build two to three Remington 870 tactical guns a year and this tool will pay for itself in short order. I did not find any negatives with this tool.
Best tool for the job(26/07/2017)
Got an 870 Express a little while ago, and decided to remove the mag tube dimples in case I wanted to add an extension. After researching the methods to remove them, none seemed easy and reliable. Ran across this product and decided to give it a shot, as XS is a reputable company I've bought products from before. After following the instructions, it took longer to disassemble the gun than it did to remove the dimples. Finish was unharmed inside and out. A bit expensive, but worth every penny.
V3 Field Sport issues(16/09/2017)
So be very very careful if you decide to use this on a newer V3 Field Sport. I follow the instructions carefully, use high end oil and it still became stuck/wedged inside the factory Mag Tube. We ultimately got it out, but my guess is that the V3 has a slightly small ID than the 1100.
Worked very fast and well(28/01/2018)
Take the barrel off, Lube the swage, lube the swage, did I mention you should lube the swage? Grab the magazine and rest gently on the buttstock. You don't want to beat down hard on the magazine tube as it's braised on the receiver and you could damage your gun beyond repair. The good news is you don't have to. Put the swage in the mag tube, grab the tube firmly and gently tap the swage down until it's fat end is just above the threaded rim of the magazine tube. STOP THERE, STOOOOOOOPPPPP there. Stop, don't bang it down further or you could destroy your gun beyond repair. Now take a steel punch and brace the mag tube on a piece of wood or a hammering puck. Gently tap the dimples out till they are flat. You'll know it's right as the swage will just fall out. It's scary when you beat it in as it will get stuck hard and you'll get freaked, but just gently tap the mag tube dimples with the steel punch and hammer and you will be fine. Be careful of your threads, stay away from them, take your time. Double check with a follower that you've made the dimples flat enough and there is no binding at all. If there is just put the swage back in and hammer them out more until they're smooth. I bought this and thought about using it for a month before I finally did. I had drilled out an 870 before and I hated the way it buggerd my mag tube and looked like baby kaka. I've done two Remington 870's with this thing and it's the only way to go, so simple and clean and I can actually do it in about the time it takes to read this. No really, it's quick and did I mention it works well? Now no creative riffing here! Don't think "Ohhhhhh I did something like this with a socket on my old 65' Chevy pickup, and I got this, and if I screw it up ya'll know it'll buff out." NO, no it won't, it won't buff out and you'll rat your gun. Just stick to the instructions and you will be fine. Now get to work you could of had it done by now. Take your time, work the steps, consult your higher power, tap gently. This thing works like a dream. If there's a downside I've done two 870's and I'll probably won't use it again ever, and even if I do I'll forget where I put this thing, so if I want to use it, I'll need to buy another one because this is really the only way to fix a Remy mag tube. Hey seriously you would have been done by now, and no nasty drill holes or ugly file or Dremel marks that are going to rust up on you. Get busy pilgrims your mag extension awaits.
Works as Advertised on Tac-14(04/04/2018)
Read the directions and followed them exactly. Lubed the swag and magazine dimples with Silicone High Vac grease from Dow. It is a good idea to put a rag or some cut-up T-shirt material into the mag tube to catch anything like metal shavings and grease/oil you use to lubricate the operation.
Tapped swage into magazine after removing mag nut, plug, and barrel. Used small ball peen hammer until it bottomed out at end of mag tube. Peened outside of mag where dimples were with polymer faced side of gunsmithing hammer until sage loosened then fell out. Had very little re-bluing to do, but had to polish out dimples inside with Dremel and a cylindrical coarse Cratex polisher that I bought for this kind of thing. Used Birchwood-Casey Super Blue followed by light steel wool then T4 to get the color right. Go slowly and you won't have a problem.
Worked Great(09/04/2018)
Very easy to use. A little CLP on the mag tube and the swage. Used a small hammer from my gun kit, tapped it in until it started to get a little tough. Pulled it back out, a little more CLP and tapped it all the way in (left a small gap between the end of the tube and the swage incase I needed to tap it out for some reason). Took a small punch and hammer, tapped around the edges of the divots, the swage pulled right now. All in all about 15 minutes of work. Well worth the money.
Works Perfectly(12/05/2018)
Coated the bottom half of the swage and the dimples with Grizzly grease and tapped in with a rubber mallet while holding the gun by the mag tube so the force wasn't transferred to the base. Surprisingly it tapped in much easier than I had anticipated. Then tapped around each dimple using a 1/4" flat punch and a tack hammer (small hammer, about 4oz). Each dimple took 8 or 10 taps all around and smoothed out very nicely, can't even feel anything where the dimples were. Did not need to dress the inside at all and can barely see any marks on the outside. Took longer to assemble the hammer punch, grease etc than it did to tap out the dimples. Didn't want to grind out the inside of the mag so very glad I found this alternative.
N.º de producto: 006000119 XS SIGHT SYSTEMS MAGAZINE TUBE DETENT SWAGE-REMINGTON 12 GAUGE Ref Fabricante: RE-7000-1647533044318 En el pasado, instalar una extensión del tubo del cargador en una de las escopetas de la serie 870/1100/11-87 era tan simple como retirar la tapa del cargador, levantar el retenedor del resorte del cargador y cambiar los resortes antes de enroscar la extensión. Con la llegada del sistema de retención del resorte del cargador y la tapa del cargador con detentes, esto ya no es posible. Ahora se debe encontrar una manera de eliminar esos detentes para que el seguidor pueda deslizarse más allá de ellos. La solución más común es desgastarlos desde el interior; aunque efectivo, esto se ve terrible y crea dos agujeros de fácil acceso en el tubo del cargador para la suciedad y otros desechos. El Swage para Tubo de Cargador de XS® Sight Systems te permitirá eliminar fácilmente estos detentes sin crear estos agujeros.
69.9EUR069,90 €
*
Pedido pendiente, tiempo de entrega aproximado 4-12 semanas desde el almacén de EE. UU.
In the past, installing a magazine tube extension on one of the 870/1100/11-87 series of shotguns was as simple as removing the mag cap, prying up the magazine spring retainer and swapping out springs before screwing on the extension. With the advent of the detent style magazine spring & mag cap retention system this is no longer possible. Now one has to find a way to remove those detents so the follower can slide past them. The most common solution is to grind them away from the inside; while effective, this looks terrible and creates two ready access holes in the mag tube for dirt & other debris. XS® Sight Systems Magazine Tube Swage will allow you to easily remove these detents without creating these holes.
Más...
En el pasado, instalar una extensión del tubo del cargador en una de las escopetas de la serie 870/1100/11-87 era tan simple como retirar la tapa del cargador, levantar el retenedor del resorte del cargador y cambiar los resortes antes de enroscar la extensión. Con la llegada del sistema de retención del resorte del cargador y la tapa del cargador con detentes, esto ya no es posible. Ahora se debe encontrar una manera de eliminar esos detentes para que el seguidor pueda deslizarse más allá de ellos. La solución más común es desgastarlos desde el interior; aunque efectivo, esto se ve terrible y crea dos agujeros de fácil acceso en el tubo del cargador para la suciedad y otros desechos. El Swage para Tubo de Cargador de XS® Sight Systems te permitirá eliminar fácilmente estos detentes sin crear estos agujeros.
Más...
Evaluaciones de clientes para XS SIGHT SYSTEMS MAGAZINE TUBE DETENT SWAGE-REMINGTON 12 GAUGE
Número de evaluaciones: 11
De brownells.com: 11
Evaluación media: 4,2
Disappointed(22/03/2015)
I had high hopes for this. Being a machinist, I thought the concept was great as apposed to drilling the magazine tube. I tried several times and the detents only partially pushed out. What really made me give this one star is that it damaged the magazine tube. While it partially pushed out the detents it also pushed out the area of the mag tube where the detents are. This made it difficult to put the barrel back on. Now taking the gun apart and putting it back together are extremely difficult.
Great tool(22/05/2015)
This is a great tool, you will need a flat punch set and a hammer to use this though. No more need to drill holes in the tube to add an extension. Follow directions exactly and it works great. Very good value for the professional or hobby smith.
Does what is advertised(29/02/2016)
Simple , easy to use ( follow the instructions) I was able to almost get the detents out without "peening" as suggested in directions. Minor use of punch was required to "clean up" job. Added a 2 shot Scatter gun tech extension to a Remington 870 express magnum. Adds to versatility to my utility shotgun.
Right tool for the job!(07/04/2016)
This tool is definitely worth the money. I previously tried a "do it yourself" method of dimple removal and ended up ruining my old 870.
I bought this tool and tried it on a brand new 870 and within minutes I had the dimples removed and everything functioning perfectly!
Oil the tool, tap it in till the shoulder contacts the tube, you should notice the dimples have raised at this point, take a small punch and gently flatten the remainder of the creases where the dimples were while the tool is still in place. If everything is done correctly the tool will slide out without any effort.
I wouldn't hesitate to buy this tool even if you only use it one time, it's definitely cheaper than the cost of a replacement magazine tube!
XS SIGHT SYSTEMS MAGAZINE SWAGE(30/10/2016)
A great tool, read the instructions carefully before you proceed. I set up my Remington 870 action/mag tube in a gun vice in the vertical position, clamping on the action flats. As per instructions I gave the swage and the inside of the mag tube a light coat of firearms grease. Using my Brownell's gunsmith hammer, it took me four hits to bring the shoulder on the swage to the edge of the mag tube. Keep an eye on the progress of the swage and as soon as the swage shoulder touches the edge of the mag tube, stop hitting it. Then using a 1/4" diameter flat punch I peened the dimples carefully. I knew the job was done when the swage slipped easily out of the mag tube. I then used a rotary tool with a light sanding spool to polish the inside of the tube where the dimples had been. Reassembly of the mag tube was without problems and the shell follower and mag tube spring operate smoothly. This is a simple and valuable tool if you are building a tactical type Remington 870. I build two to three Remington 870 tactical guns a year and this tool will pay for itself in short order. I did not find any negatives with this tool.
Best tool for the job(26/07/2017)
Got an 870 Express a little while ago, and decided to remove the mag tube dimples in case I wanted to add an extension. After researching the methods to remove them, none seemed easy and reliable. Ran across this product and decided to give it a shot, as XS is a reputable company I've bought products from before. After following the instructions, it took longer to disassemble the gun than it did to remove the dimples. Finish was unharmed inside and out. A bit expensive, but worth every penny.
V3 Field Sport issues(16/09/2017)
So be very very careful if you decide to use this on a newer V3 Field Sport. I follow the instructions carefully, use high end oil and it still became stuck/wedged inside the factory Mag Tube. We ultimately got it out, but my guess is that the V3 has a slightly small ID than the 1100.
Worked very fast and well(28/01/2018)
Take the barrel off, Lube the swage, lube the swage, did I mention you should lube the swage? Grab the magazine and rest gently on the buttstock. You don't want to beat down hard on the magazine tube as it's braised on the receiver and you could damage your gun beyond repair. The good news is you don't have to. Put the swage in the mag tube, grab the tube firmly and gently tap the swage down until it's fat end is just above the threaded rim of the magazine tube. STOP THERE, STOOOOOOOPPPPP there. Stop, don't bang it down further or you could destroy your gun beyond repair. Now take a steel punch and brace the mag tube on a piece of wood or a hammering puck. Gently tap the dimples out till they are flat. You'll know it's right as the swage will just fall out. It's scary when you beat it in as it will get stuck hard and you'll get freaked, but just gently tap the mag tube dimples with the steel punch and hammer and you will be fine. Be careful of your threads, stay away from them, take your time. Double check with a follower that you've made the dimples flat enough and there is no binding at all. If there is just put the swage back in and hammer them out more until they're smooth. I bought this and thought about using it for a month before I finally did. I had drilled out an 870 before and I hated the way it buggerd my mag tube and looked like baby kaka. I've done two Remington 870's with this thing and it's the only way to go, so simple and clean and I can actually do it in about the time it takes to read this. No really, it's quick and did I mention it works well? Now no creative riffing here! Don't think "Ohhhhhh I did something like this with a socket on my old 65' Chevy pickup, and I got this, and if I screw it up ya'll know it'll buff out." NO, no it won't, it won't buff out and you'll rat your gun. Just stick to the instructions and you will be fine. Now get to work you could of had it done by now. Take your time, work the steps, consult your higher power, tap gently. This thing works like a dream. If there's a downside I've done two 870's and I'll probably won't use it again ever, and even if I do I'll forget where I put this thing, so if I want to use it, I'll need to buy another one because this is really the only way to fix a Remy mag tube. Hey seriously you would have been done by now, and no nasty drill holes or ugly file or Dremel marks that are going to rust up on you. Get busy pilgrims your mag extension awaits.
Works as Advertised on Tac-14(04/04/2018)
Read the directions and followed them exactly. Lubed the swag and magazine dimples with Silicone High Vac grease from Dow. It is a good idea to put a rag or some cut-up T-shirt material into the mag tube to catch anything like metal shavings and grease/oil you use to lubricate the operation.
Tapped swage into magazine after removing mag nut, plug, and barrel. Used small ball peen hammer until it bottomed out at end of mag tube. Peened outside of mag where dimples were with polymer faced side of gunsmithing hammer until sage loosened then fell out. Had very little re-bluing to do, but had to polish out dimples inside with Dremel and a cylindrical coarse Cratex polisher that I bought for this kind of thing. Used Birchwood-Casey Super Blue followed by light steel wool then T4 to get the color right. Go slowly and you won't have a problem.
Worked Great(09/04/2018)
Very easy to use. A little CLP on the mag tube and the swage. Used a small hammer from my gun kit, tapped it in until it started to get a little tough. Pulled it back out, a little more CLP and tapped it all the way in (left a small gap between the end of the tube and the swage incase I needed to tap it out for some reason). Took a small punch and hammer, tapped around the edges of the divots, the swage pulled right now. All in all about 15 minutes of work. Well worth the money.
Works Perfectly(12/05/2018)
Coated the bottom half of the swage and the dimples with Grizzly grease and tapped in with a rubber mallet while holding the gun by the mag tube so the force wasn't transferred to the base. Surprisingly it tapped in much easier than I had anticipated. Then tapped around each dimple using a 1/4" flat punch and a tack hammer (small hammer, about 4oz). Each dimple took 8 or 10 taps all around and smoothed out very nicely, can't even feel anything where the dimples were. Did not need to dress the inside at all and can barely see any marks on the outside. Took longer to assemble the hammer punch, grease etc than it did to tap out the dimples. Didn't want to grind out the inside of the mag so very glad I found this alternative.